Zoom is a telecommunications service that allows both businesses and people alike to video conference each other online. It’s gaining in both popularity and importance as remote communication is becoming more and more needed in the ever-changing world. Here is a beginner’s guide to Zoom. Its a step by step “how-to” guide to ensure efficient and effective meetings. Learn how to install it, sign up, and create meetings, as well as tips and tricks!

How To Download Zoom
- Go to https://zoom.us/download
- Click “download”
- Open the installer window
- Follow the instructions onscreen
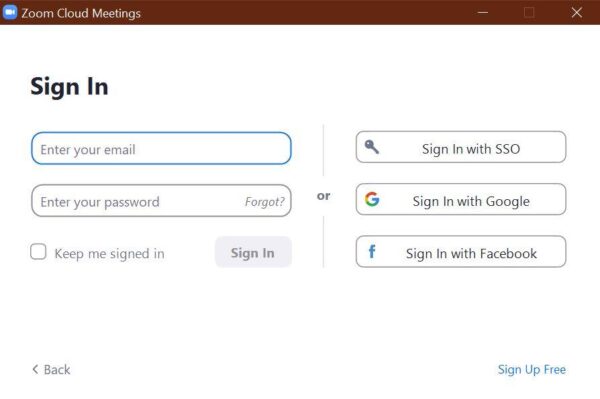
Sign Up
- Tap on the Zoom icon
- Click on “Sign Up” or “Sign In”
- Enter your name, email address, and password
- Verify your email address
- Sign in
Schedule a Meeting
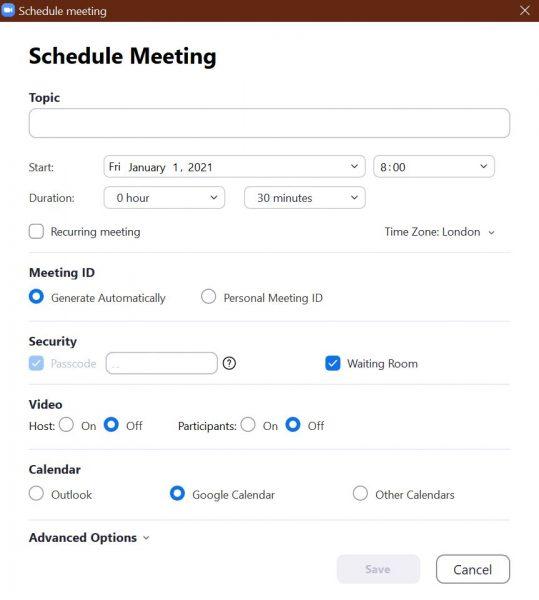
- Click on “Schedule Meeting”, a blue button on the bottom right of the screen
- Enter the meeting topic and date details
- Decide if you want the meeting to recur and when
- Decide if you want to use a Personal Meeting ID or not. This is a 10 digit number given to your account. If other people have this number they can join your meeting directly
- Decide if you want to turn the video on or off for members, as well as audio
- Decide if you want to add a calendar to the event
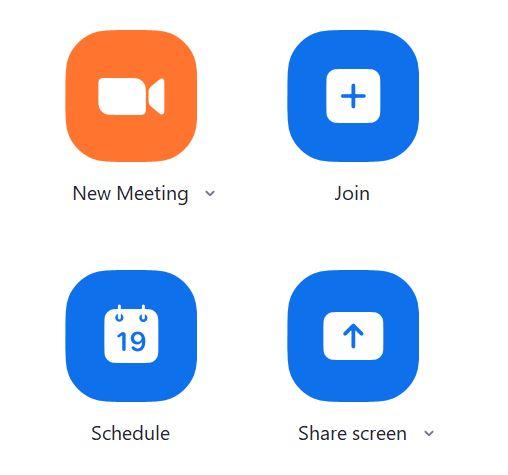
Create a Meeting
- Open the Zoom app
- Click on “New Meeting”, an orange button on the top left of the screen
- The meeting will start immediately
- Select if you wish to join with computer audio or not
- Tap the toggle switch to turn the video on or off
- Click “End Meeting” to finish the meeting
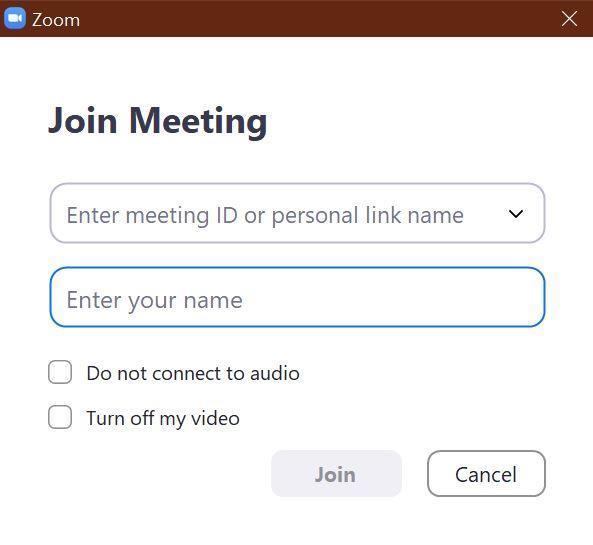
Join a Meeting
- Receive the Meeting ID, a 10 digit number linked to the meeting you wish to join, or else copy the link in the Zoom invitation message
- Open the Zoom app
- Click on “Join Meeting”, a blue button on the top right side of the screen
- Enter the Meeting ID or the URL link
- Decide on the name that will be displayed to other meeting members
- Decide if you wish to turn off your audio, video, or both
- Click “Join Meeting”
During the Meeting
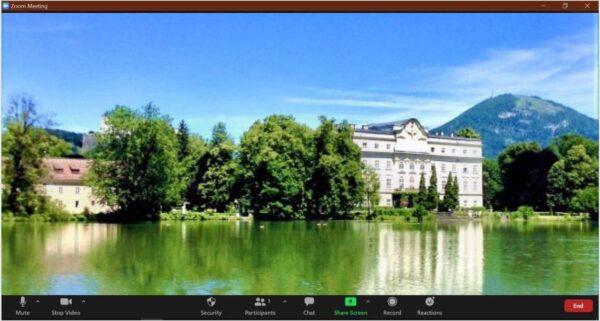
- Once you have joined the meeting, there will be a dark bar at the bottom of the screen with many options for you to click on
- “Mute” will prevent other members from hearing you speak. Clicking on the small arrow next to “Mute” will allow you to change your speaker and audio settings
- “Start Video” will turn your camera on or off. Clicking on the small arrow next to “Start Video” will allow you to change your camera settings or set a new background
- Security allows members to rename themselves, unmute themselves, share their screen, and enable a waiting room for members to stay in until the host accepts them
- “Participants” will bring up a list of every member in the meeting. Clicking on the small arrow next to “Participants” will allow you to invite more members
- “Chat” will allow you to send messages to other members
- “Share Screen” will allow other members to see your PC/Laptop screen, as well as making it possible to draw on the current screen being shown. Clicking on the small arrow next to “Share Screen” allows you to set how many members can share their screens at once
- “Record” will video the entirety of the meeting, both the audio and the screen sharing
- “Reactions” allows you to send emojis to other members
Read more technology how-to’s here!